Thursday, June 13, 2013

Broken Rudder

One day, for no reason at all, the rudder snapped at a very inopportune time. I was purposefully shooting the gap on the rocky Los Angeles Harbor entrance at San Pedro and once I cleared the Los Angeles Lighthouse I tightened up my sheets/wind angle, and watched the bow round up into the wind.  I reached down to find a completely gutless rudder.  Just nothing.  The feeling in your hand....it must be the same feeling cartoon characters have when the wheel completely snaps off the car they are driving and they slowly look at the camera.  Only having been in this situation can I understand where that famous look originates.  Its not from a place of fear or concern, but a calm and puzzling disbelief of the reality in your hand.

Now, with that being said, the very next though firing through my synapses comes similar to slamming your gas pedal to the floor when you are already at 200 MPH.  Complete focus, white knuckled, and with no room for error.  All the while, a tiny Devil dances around back of my head doubting I will get out of this unscathed, and forces me to consider a plan for swimming around the violent battle field where the sea meets the jagged rocks.

The bow spun 180 degrees, sending me straight into the rocks at about 7 knots.  I let out the main, which flew leeward and sucked up my mainsheet through the block in the same quick and sloppy manner a child would consume spaghetti. Now that I had spun 180, the jib backwinded onto the mast in a hove-to position, and I stood there, rudderless, hoping I wouldnt hit the rocks.  As I turned backwards, towards my pre-snapped course heading, I watched my broken rudder bob about the harbor not even 20 feet from my stern.  Irony.

Luckily when your boat is rudderless the hove-to position doesnt really work as intended, and the jib somewhat turned into a makeshift spinnaker, pushing me downwind, past the rocks, through the harbor entrance, into the ocean, and unfortunately into the shipping lane of the busiest harbor on the Pacific coast.  I called the coast guard at this time, who were nice enough to remove my aimless boat from freighter traffic.

So how the hell did the rudder snap?  Upon inspection, the break was at the bolts of the pintle, and the best guess is over time water had accumulated in those bolt holes, chilled and expanded many times, and weakened the overall structure.  When I tightened up my sheets the "airplane wing foil" was created, which added pressure known as "weather helm" and snapped it free and clear where you see below.


The rudder here should be about 4 feet longer than you see here.


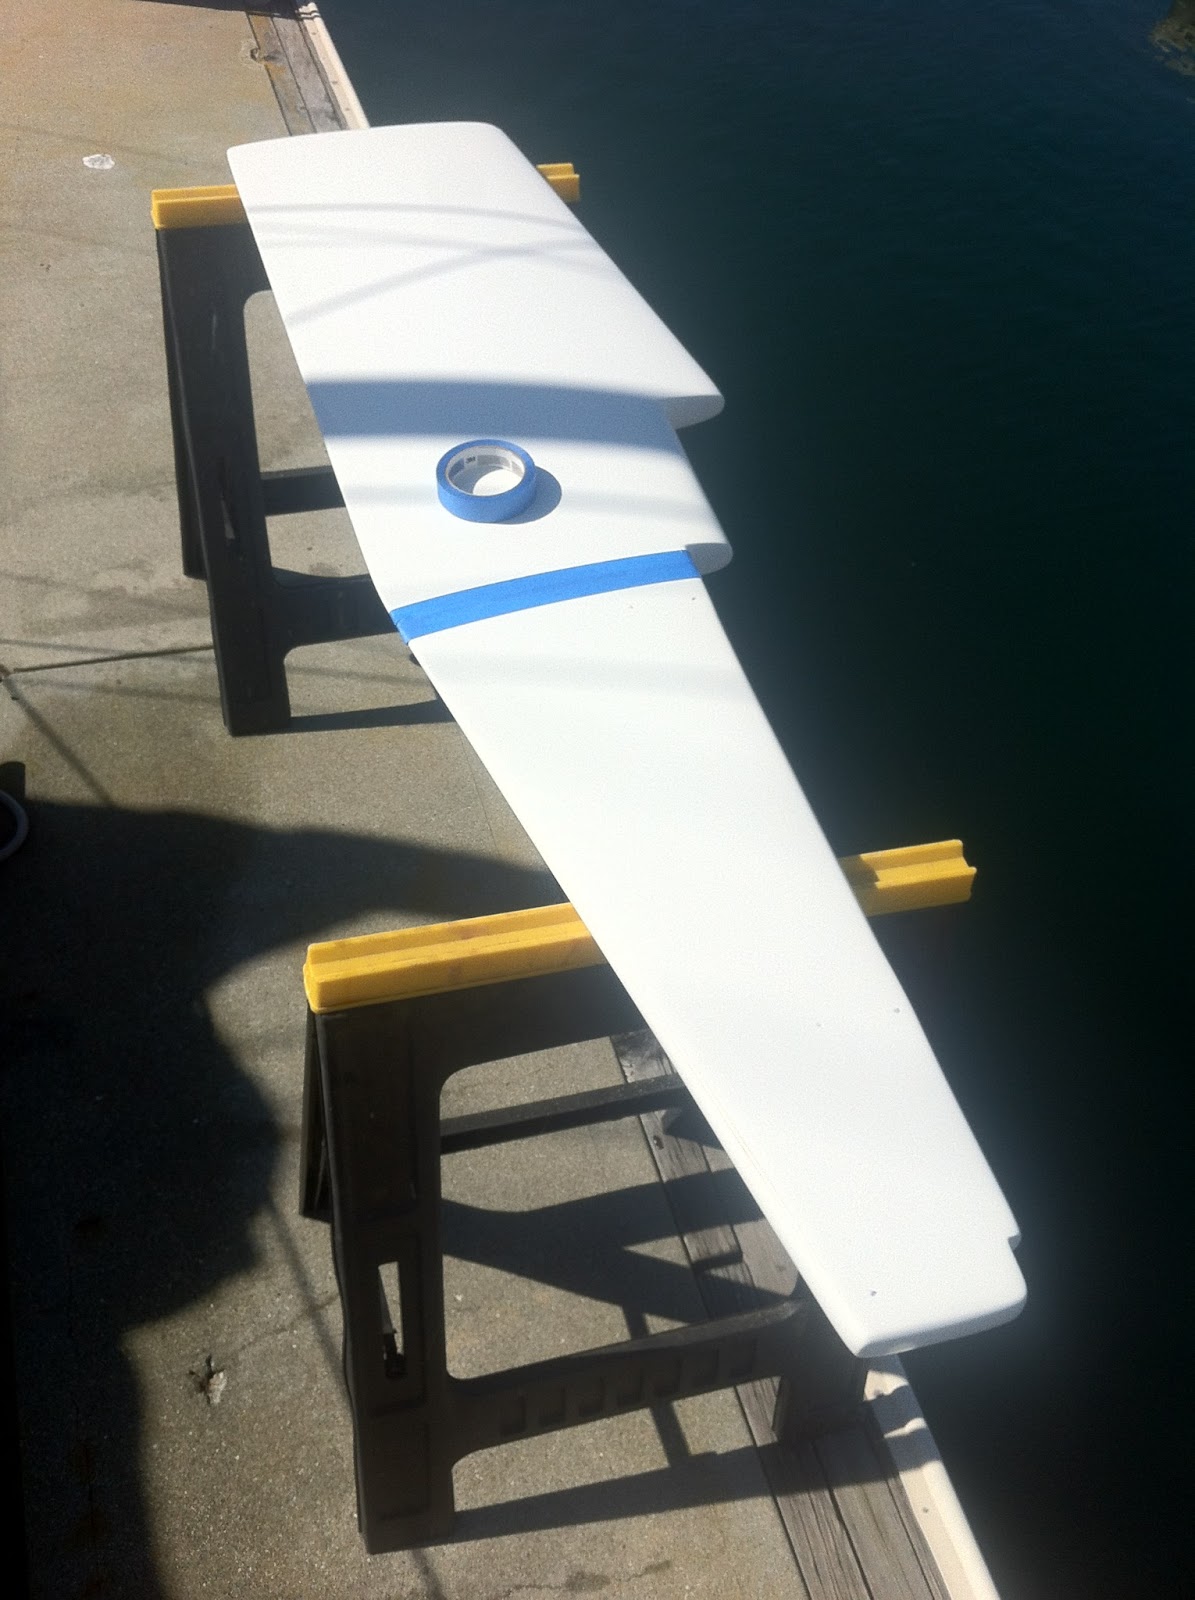
New rudder, Its a beast, 76 inches top to bottom.  I purchased it from Foss Foam, the company originally created the rudders for Catalina when they were based in California.


New pintle bushings from Catalina Direct, really nice to have, quiets down the banding of the rudder.

Painting, drilling, and mounting the rudder.


New beefy hardware


Mounted.


I also refurbished the tiller during all this as well.  More to come on that when I find the pictures.  

Sunday, May 12, 2013

New Main and Jib

The existing main upon purchase was very old, very cheap, and blown out.  I could never get it to stop flapping.  When I would sail it would sound similar to flying a helicopter.  The leech was blown out, the curvature lost, ripped everywhere, and the head was about to rip off.


One day on a broad reach, while the main was way out over port, I tacked to starboard without bringing the main in, causing it to rush past my head to the other side of the boat.  The inertia, the wind, something pushed it to its limits, ripping the main from leech to luff.


I quickly purchased a new main from a local sailmaker, and a very short time later I purchased a new jib.  At about 115-120%, the new jib is far better suited for performance sailing than the old, massive, 155% genoa which came with the boat.  


Not long after purchasing the new main, I found it to be too large.  This boat has a floating boom, so nothing is locked down, meaning a larger main means I have less head clearance in the cockpit.  It finally got too be an annoyance, and I had the same sailmaker recut the new main to give me almost 20 inches of badly needed head clearance while in the cockpit.  This was great in theory, but the reality was the recut lost the leech and the sail would never properly flatten.  Back to the sailmaker, where a full batten was added in place of the top-most existing regular sized batten.


Monday, April 8, 2013

Stanchion Repair

The port side stanchion, closest to the cockpit, was very loose when I purchased the boat.  When I would wash down the deck it would leak right into the cabin at an uncomfortable rate.

I was so nervous about the process of fixing the problem.  This was my first boat, I wasnt sure how I felt about drilling and working with epoxy, but once I removed the bolts to the stanchion I quickly realized how my involvement was only going to help the situation.  I had studied for about a week or two on the best methods for sealing/bedding deck hardware.  I use the drill, bore, epoxy, redrill, countersink, butyl tape method.  It works incredible, Ive done it many more times which will be covered at a later time.

Removed the stanchion


 I drilled out the holes to a larger size, then routed out UNDER the fiberglass, a very important step.

Filled with epoxy and let it sit for a week, then I redrilled the proper sized holes for the screws to get through.  I countersunk the screw holes so I could fill it with flexible sealant, making this thing waterproof.

Tuesday, April 2, 2013

New blocks all around

Im a pretty fit guy, Im 30 and work out nearly every day, whether its the gym or surfing.  When I first raised the sails it was so physically taxing that I would get nausea, not the best first impression of a new purchase.

Running up on deck I saw the block sheaves were completely destroyed.  Those particular blocks are no longer produced by Ronstan as they suck.  There is no way to change the sheaves, and no way to remove the block from the baseplate.   Its all one big dumb unit.


This is a good shot of the sheave deterioration.   


This was the case for both the main and jib halyards.  I want to later use the existing baseplate location for other lines such as downhaul, topping lift, etc, so instead I drilled holes into the mast baseplate and connected blocks there.
Jib halyard, notice the baseplate hole.

 Main halyard block, I ended up drilling another hole in the baseplate making that block lower to the deck, as in the picture above of the jib halyard block.

Jib halyard block, next to the old, deteriorated jib halyard block


While Ronstan did piss me off here, this last summer has proven a bit of a design revolution for the company, and I loved the sexy styling of the new Orbit line.  I went with this series all around to test the company.  If this equipment doesnt hold up, I'll move to Harken to give them a shot.   


My whole set up needed work.  As seen below, the downhaul overlaped the boom vang, running interference when the boom moves to the port side.  For continuity, I added another block for the downhaul and removed all existing blocks.  This set up is clean, and very hard to go wrong. 


For the jib sheet blocks, I went with a slightly different model because it has a very sexy half moon shape missing from the middle.  When it comes to typical boring block design, these have to be the sexiest.  The jib blocks are from the same series as the previously mentioned blocks, meaning they are of the same weight limit but have a slightly different/sexier design.

The jib sheet blocks also connect to the cars in a different fashion than the halyard blocks, using the new Dyneema material.  This new technology is incredibly strong, so much that it is being used for standing rigging on those vessels which can afford it.  One nice aspect to the set up is the blocks stand up themselves because of the Dyneema connection.  I like the look.

The old blocks/cars which came with the boat have held up very well, I have kept them on the boat so I have now have two sets of blocks/cars on both port and starboard.


Such a sexy half moon look to them.  


New outboard

When I purchased the boat there was a 9hp Johnson outboard which was in 3 pieces in, kept in the quarterberth.  How it was every placed back there, I dont know, but it was a massive pain in the ass to get out.  Purchasing the boat in July in Southern California and removing a 100 lb engine from the breathless quarterberth was one of my better ideas, but once out it was quickly evident nothing was reparable.  The craigslist stars aligned and a newly repaired Tohatsu was found online for a great price.  The guy flipped all kinds of engines, so he discounted the price of the new outboard by taking my old broken engine.

The new outboard was impeccable, freshly overhauled, and ready to be strapped aboard.

After 6 months of use, the propeller went bad.  The propeller on a Tohatsu (and many other brands I have discovered) does not directly connect to the drive shaft.  There is a vulcanized rubber bushing inside of the propeller which fits over the drive shaft.  In my case, when the rubber gave out, I wouldnt have any power under water, but in the swells, when the prop would come out it would spin and spit water everywhere.  This is confusing, even more so when the sun is going down at Catalina Island (20 miles off the LA coast) and you are trying to make your way into Two Harbors for the evening, as was my experience.  Harbor Patrol at Two Harbors are some of the greatest people on the Island.  Once secured, my neighbor on the mooring ball quickly identified the vulcanized rubber problem, but how the hell do you get a new prop to an island?  And even if you could, how would know what you need?  Its not like internet is walking around the streets of Two Harbors, a village with a population of 298 souls (2000 Census).  Outboards are carefully engineered making an the incorrect propeller decision catastrophic to the engine dynamics.

For some strange reason, there exists a certified Tohatsu dealer at Avalon Harbor on Catalina Island, 20 miles south of Two Harbors.  I believe a separate blog could be written about the bus ride between the two villages on this island.  Precarious cliffs, switchback roads, an airport bus transfer, airport beer, a school bus from the 50's racing over washboard gravel roads making an internal racket so loud your vocal cords can not possibly compete, wild buffalo, beautiful San Nicolas Island views, and remote/exotic camping locations.

Point of all this, I got a new prop and it works great.


Wednesday, March 27, 2013

The Beginning/Purchase

I purchased my 1977 Catalina 25 from a guy who ran a charity organization out of Long Beach, CA.  The idea behind the charity was to expose children of all ages to the sailing world.  I didnt get into the details, but it wasnt working out, he was shuttering the business, and hastily selling his fleet.  A great guy named Adam Smoyer happened to show the boat to me in place of the actual owner.  Adam is a licensed captain and couldnt say enough nice things about the boat being a great first purchase for me, which was great considering he was a neutral third party.  This is even better than a surveyor who feels they need to find something in order to justify a fee.


Offer submitted and offer accepted the next day, unfortunately at 3pm on a Sunday meaning I had to sign the paperwork and race to the boat to wallow in my purchase before going to work on Monday.


The boat absolutely needs some work, but thats why I purchased it.  My dad has taught me loads of valuable mechanical, electrical, home improvement knowledge and Ive been sitting around LA surrounded by a bunch of guys with a Pete Pan complex and not able to use any of it.  I cant wait to get to work.